Saturday, May 28, 2011

Here Comes the Sun.


School is out, summer is coming and you know what that means. Frolicking in the newly found sunshine! (And yes, I just used the word 'frolicking.' Just wait, it will make a comeback this season.) But it also means it’s that time of the year to use protection... for your skin! You guessed it. The Sunscreen Post. All of you are probably sick of hearing the constant lecturing on the subject so I'll just make it a quick and painless reminder rather than a Sunday School sermon.

I really wanted to do a post about sunblock because it is super important that you protect your skin! You can argue, "Oh come on Mika, cancer won't happen to me. Its just old people." LIES. Skin cancer can happen to anyone at anytime and let me tell you, medical bills don't come cheap (insurance or not.) Wouldn't you want to use those thousands of dollars on something fun like a car (or a few fabulous pairs of shoes,) rather than something that could have been avoided?

You know what else the sun does to your skin? Premature aging. I don't know a single girl who wants to look like she is part African Elephant in the near, and I mean very near future. I will agree, tans are so hot! They make you look more toned and if you have one, you aren't going to blind anyone if you are really white and you get in your cute swimsuit. (I'm dead serious about blinding people too. It has happened on multiple occasions.) But wrinkly leather pretending to be skin is in no way, shape or form, sexy. I mean, just check out this little boys face below.

You can have a nice glow about you for the summer! Go with spray tanning. It is a safer method and is relatively cheap. Go to a local tanning salon and ask about their spray tans. If you uneasy about showing your bare necessities to a stranger, check out do-it-at-home products. Just be really careful with these because despite what Jersey Shore says, looking like an Oompa Loompa is not sexy either. I hope everyone has a blast this summer and remember to practice safe sun!

You know the drill, post comments and/or questions. Got some sun tips? Let us know! :)

Love, Mika.


Thursday, May 26, 2011

Walk the Walk.


What makes Victoria's Secret Angels so sexy? No, it is not their body. (Ha! Who am I kidding? Their bodies are FANTASTIC.) But I'd have to say it's their... walk. Have you ever noticed how sexy their walk is? I have! And the great thing about their walk is that you can do it too! All you need are some cute heels and a full length mirror.
My biggest pet peeve is when girls waddle in heels. So today I am going to try to teach you how to work them heels! How high is too high? Well, I personally like to stick around the 4.5-6 inch range. Anything higher ventures into stripper heel land and we wouldn’t want to have that.

-Have a mirror up at the end of a hallway or a cleared room. Start at the opposite end of the room/hall.
-Stand up as straight as you can go! Chin up and shoulders back. (Who knew all that nagging to have good posture would actually be necessary later in life?)
-Pretend you are walking on a straight line or like you are a cat. Cats walk with one foot in front of the other, heel-toe, heel-toe. Hence, the term catwalk. If you decide walking on a straight line is a little too sexy, you may walk with your feet a little further apart... but not much!
-Take long strides. If you don’t, you will look funny. I know not everyone is blessed with mile long legs so ‘fake it til you make it.’
-Don’t bend your knees or you will look wobbly and shaky.
-Walk toward the mirror so you can see how your body moves and try to mimic a catwalk. But put your own spin on it. :)
-Secret to rocking heels? Confidence. Trust me, people will notice if you look nervous or scared. If you look like you don’t belong in the shoes, you don’t.
You can also do this in flats to add some sex appeal to your walk. If you don’t feel comfortable in 4 inch heels yet, start out with a kitten heel or a platform shoe. To wear heels all day, invest in some inserts! They are lifesavers. Also, if you get a shoe with a ‘hidden’ platform, they will be way more comfortable than shoes with a thin bottom.

There you go my future Angels! I hope this helped! Feedback is welcomed along with questions or comments. Thanks for reading guys! You are all fantastic people. :)
Love, Mika.

Friday, May 20, 2011

Pucker Up Suga.

Short post/Story time.

I was getting ready today and couldn't find my lipstick. Most tragic day ever right? Almost. But I quickly sprung into action and figured out a substitute. Go Mika! I quickly ran into my kitchen, opened up my cupboard and lo and behold... I found our food coloring. I rummaged about and found the red one. I then grabbed a q-tip and squirted a couple drops onto the cotton part. I then applied it just like normal lipstick or gloss. I was kind of skeptical at first cause I really wasn't sure it was going to work because I had just barely thought of it like two seconds before. But much to my surprised, I was really loved it. The stain stayed on for hours even after I ate AND applied multiple layers of chapstick! I only did one coat so it was more a bright pink than red but to get red, just add another layer. All in all, crisis averted.

So as I was driving to northern Utah after this all went down and thought, "Gee, I should write a DIY lip segment." And here I am now, watching Harry Potter (Chamber of Secrets) with my cousins, and writing these tips just for you.

Look at stunning Emma Watson. I like her short hair better, (let me rephrase that, I'm obsessed with her close crop) but I liked this picture because it shows off her lips rather nicely. Sorry I got carried away! I will continue with lip color substitutes now.

Method 1: Food coloring approach as seen above.

Method 2: Grab some Vaseline and some pink/peach/red/purple/ect. eye shadow you don't ever use or is old or whatever. Crush up the eyeshadow to a fine powder and combine the two. There ya go! A brand new tinted lip gloss. I am not the biggest fan of this method but hey, to each their own.

Method 3: Get some cherry/strawberry Jell-O or Kool-Aid. You can apply one of two ways. First way is to get a wet lip /paint brush and dab at the powder. Smooth onto lips. Let dry for a moment and then get a dry brush or paper towel and wipe away the little crystals left behind. The second way is to mix the powder in with the Vaseline for a smoother application. I rather just use the powder straight so that it stains rather than spreads in gloss form.

Personal Opinion: I like stains better. They can either be bold and vivid or really subtle. They last forever too and don't get all over everything, no matter what you are doing. I'm rather excited to try this at the lake and see how it holds up!

Good luck trying these methods! Comment or email/facebook me with your results or more ideas for lip color! Thanks ladies! :) You're beautiful!

Love, Mika.

Getting Curl


Hey! It's Kaeli, Mika asked me to talk about how to curl hair. Personally I love to curl my hair because if I don't... it goes super straight and super flat. I have the kind of hair that never needs a flat iron, but if I don't blow-dry it, it has absolutely no body. So the first thing I want to tell you about are the curlers pictured above! I got a set for Christmas and I LOVE them. First off, don't be too skeptical. I was a little skeptical at first. They look crazy, and the idea is almost unbelievable but these curlers are basically flattened tubes that are coiled in to curls. You stick a hook through the tube and it uncoils the curler, then you catch your hair with the hook, pull it through and let it recoil. Here's the demo from their website:


I love absolutely everything about these curlers. They work great! You can purchase them at Sally's Beauty Supply stores or online at: http://www.curlformers.com.
They come in different lengths and widths for longer hair or bigger curls. I highly recommend them. The only downside is if you are used to curlers you can sleep in, these won't be the most comfortable, but I've done it before and it wasn't entirely terrible either. You can purchase them in large sets or smaller packages so you will be able to find an affordable price.

Now let's talk other curling options:

1. Foam curlers: I always used to use foam curlers because my hair hates to hold curl, but they were messy and hard to use and my hair always ended up in knots when I pulled them out. I don't really recommend them. But if you don't want to get the Curlformer curlers, and your hair doesn't hold curl... they are probably a good way to go. And they are a little more comfortable if you have to sleep in them. They also come in different sizes for tighter or looser curls, and since your hair just wraps around them you don't have to worry about different lengths. They do give nice curl, but since hair is so layered and tightly wrapped in them, sometimes it remains damp, even through the night and curls don't always stay.

2. Curling Irons. We'll discuss two kinds of curling irons here.

-Your basic barrel curling iron, of whatever size. If you're anything like me curling irons were just a myth. Some nice little thing that everyone else used to achieve great curls, but whenever you tried it was a more like 2-second curl. I have a few suggestions for using curling irons. Don't clamp your hair in and then twist the iron. It works for some people, but for me it was never effective, it gave me volume-less curls that eventually just went straight. Then I learned to wrap my hair around the curling iron by hand. I'm pretty sure this method has been around as long than electricity, but we've some how forgotten about it with all the excitement of modern technology. Take the curling iron and a section of hair and wrap your hair, starting as close the roots as you can get, tightly around the barrel of the curling iron. OVER the clamp. Do not clamp your hair into the curling iron. Hold it a little bit longer than you would with it clamped in and then let go. TA-DA it's even a prettier curl, I think. My hair in the bottom picture in the "About Me" section was done this way.Plus I usually do my whole head this way, wear that way for the day, and then in the morning I brush it out into pretty waves. The curl will last through the night!

I highly suggest always putting gel in your hair while it's damp and then blow drying it completely before even attempting to use a curling iron. It will just work better. I promise.

Don't use too much hairspray! Hairspray should go on lightly over pieces just before curling them or after curling your entire head of hair do not spray it on individual pieces that you've just curled. Make sure to hold the hair spray at least six inches from your hair, if not more. Holding it too close applies it to thick and adds moisture. This gives your hair weight and moisture which will actually make it go flat faster!

-Three Barrel Curling Iron. I LOVE three barrels. They are fast and easy and give you beautiful wavy hair. You can get them in all different sizes and they give plenty of shape and body to your hair, without giving you too much "poof" if you know what I mean. I use mine all the time and I love it you can purchase them anywhere from Wal-Mart to a beauty supply store like Sally's. I bought mine at Sally's, which by the way, is a store that I highly recommend for hair care products as well as nail polishes and other nail care supplies. They can be affordable or expensive, never pay more than you are comfortable with, but they are definitely worth a little extra money. Once again, I would recommend using hair gel first and then light hairspray after for hold and volume!
Hope these were some good tips! Enjoy!

P.S. I'll try to get a video tutorial up on my curling soon!

Thursday, May 19, 2011

It Is A Purple Summer.

Hey guys! :) Today I was just chillin in my room with my sister (who is awesome) and we decided to mess around with some romantic summer looks because I am currently obsessed with purple eyeshadow and flowy shirts. So I put together two 'date' outfits together along with hair and makeup.

Makeup:

Alright! So you are going to need:

-light purple eyeshadow
-dark purple eyeshadow
-black eyeliner
-light shimmery pink eyeshadow
-black mascara
-pink lipstick
-clear gloss
-nude lip liner
-dark silver or gray eye shadow
-pink blush

STEP 1: Ok so what I did first was took a light purple liquid eyeshadow with a little shimmer in it and put it on the lid (do not go past the crease.)


STEP 2: Next, I took a thin brush that was really stiff and brought the silver shadow right underneath right under the bottom lashes. I extended the gray line straight out for a winged effect. It looks a little curved here but I promise I went in a straight line.


STEP 3: Grab a little bigger brush and dab the dark purple into the crease. Connect the end of the gray with the end of the purple so they create a 'V.' Leave about 1/3rd of the inside corner untouched by the darker purple.


STEP 4: Highlight the inside corner of your eye (next to your tear duct) and your brow bone (the outside half right under your eyebrow) with the light pink shadow. Blend all eyeshadow with a fluffy blending brush.


STEP 5: Rim both the top and bottom waterlines and then again on the top lid with the black eyeliner. Place a little blush on the apples of your cheeks. Throw a little pink lipstick on with some gloss over it. Remember to use lip liner first!


This was our finished product. Note: You can switch the gray and the purple. Today I wore the purple on bottom and the silver on top so play with it. :)


Now onward to the hair! For this one, we put her hair half up/half down. We took 1/3 of her hair and put it in a little clip. We sprayed it down with water and used a diffuser to dry it. Then, we used some fiber gum putty to scrunch her hair. (I used Garnier Fructis Style. It smells phenomenal. It comes in a little neon green tub.) Then we hair sprayed it to keep it lasting longer. I was originally going to curl it instead of scrunch but we didn't have much time. Finish off with shine spray so it doesn't look too matte from all the hairspray.


Outfit Idea 1:
I like this one for indoor things. Perhaps lunch or something to that effect. Flowy floral top, jeans and heels or flats. I really like flowy things in the summer cause they breathe!


Outfit Idea 2:
I like this outfit for more outdoor events such as chillin in the park or going on a walk. Flowy top (again I know,) jean shorts, and flip flops. To take it up a notch, wear a purple or pink undershirt instead of whit


Good luck! I hope you all have as much fun trying these as Ayumi and I did! Comments/questions about how it went are welcome!


Love, Mika.


Monday, May 16, 2011

To The Girls

I've been thinking quite a bit lately, and I've realized I've got a lot to say. So here it goes, and PLEASE listen up. It's important.

I've got a feeling that no matter who you are, you have your moments when you feel like nothing. I want you all to know that everyone has those moments. Even that super-gorgeous model looking girl, the one you think couldn't possibly see one thing she doesn't like about herself, has those moments. I want you to stand in front of a mirror and look at yourself. With or without your make-up on, I want you to stand there and look at your reflection until you can see how beautiful you really are. No amount of make-up or new clothes or anything else that can alter your appearance will ever make you feel beautiful until you can look in the mirror and see how beautiful you are.

I want you to look in the mirror until you can honestly love what you see. I'm not saying you should be vain, or full of yourself, I think you should love yourself though. And I know that some of you are thinking that you can't just do that. It's not that easy. You're thinking "sure, maybe for that super-gorgeous model girl, it's easy, but not for me." And You're right, just a little bit right. It's not THAT easy when you've spent your life telling yourself you don't measure up, or listening to other people who tell you that you don't. But you have to change the way you think. I'm not telling you this because I think you should be optimistic just for the sake of being happy. YOU ARE BEAUTIFUL, WONDERFUL, WORTHWHILE GIRLS! And for some reason you just don't see it. So this is to the girls.

To the beautiful girls who look in the mirror and focus on all the little things that look wrong to them: NO ONE ELSE SEES THAT! Stop worrying that one side of your mouth is a little higher when you smile or that it's a little crooked. Stop worrying about that tiny little freckle that you think ruins your complexion. Stop wishing your nose was shaped any different and that your eyes were shaped different or whatever else it is that you are picking yourself apart for. NO ONE ELSE NOTICES THOSE THINGS, they are all too busy seeing all the beautiful things about you.

To the girls that refuse to believe how beautiful they are, even when everyone tells them: START BELIEVING IT! I know, it's hard, but just do it. It's all a process of what you tell yourself. Trust me ALL of your friends aren't lying to you to make you feel better. Learn to accept the compliments, believe them.

To the girls who listened to that one pretty girl who told you, you weren't pretty enough: STOP BELIEVING IT! Girls are vicious and mean sometimes. Seems to me like we're all a little insecure and some girls handle it by putting others down. Don't let it get to you. You are the only person in the world who gets to decide how beautiful you are and I want you to decide right now that you are every bit as beautiful as everything you want to be.

To the girls who don't feel beautiful because no one tells them: Chances are, we think you already know, or we're just flat out intimidated by you. I know, it sucks, but I promise it's pretty likely. Start giving compliments to other people. HONEST compliments. It will help, I promise.

To the girls who have said something mean, something that they didn't even mean, just to feel better: SHAME ON YOU! And if you can, fess up, you've probably done more damage than you think and it just might help undo it. You know how it feels and why on earth would you want to do that to someone else? Watch what you say. We forgive you, now don't do it again. Girls remember stuff like that. Forever. Let's be nicer to each other, we don't want to contribute to this world's way of telling us we're not ever good enough.

Basically to all the girls, just stop comparing yourself to other people stop wishing you were prettier. You will never feel prettier until you can see how pretty you already are.

And remember, no one is perfect. Be patient with yourself, you will always have moments when you try to tell yourself you aren't beautiful, you aren't good enough. It's natural. But that is not important. What IS important is the next moment when you stop all those things, and you look in that mirror or you look inside yourself and you refuse to stop looking until you see how beautiful you are.

I'm fed up with how hurt girls are, how insecure they are about themselves. We don't have to be. It's a choice. And I honestly believe that having a beautiful personality makes you more beautiful. Literally. You think it doesn't. You think that "Beauty comes from within" Is a cliche statement and that nobody really means it, but it's true. It's not just a nice fairytale thought. If you want to feel beautiful you have to be beautiful on the inside. You have to believe your beautiful too. Beauty is really more about what we feel than how we look anyway. If you feel beautiful, you don't worry about how you look because you already feel great.

And lastly, perfection isn't beauty. Perfection isn't real. One of my close friends, a girl who I have always thought was very beautiful mentioned one day that when she watches T.V. she constantly has to remind herself "That's not real." Sure you are looking at real people. And yes, they really are beautiful. But what you are being presented is not real. They have heaps of make-up and hair extensions and then airbrushing and perfect lighting and all kinds of things to make them look perfect in that moment. BUT IT'S NOT REAL. So stop trying to be that. YOU ARE BEAUTIFUL.

I love you all and I wish more than anything there was a way that I could help you all to see just how perfectly beautiful you are, but I can't do that. Only you can. So show yourself. Make yourself see. Do it now. Decide, and do it because you, and only you, can. And you deserve to.

-Kaeli Chae Madsen

The Beautiful Blast From The Past.


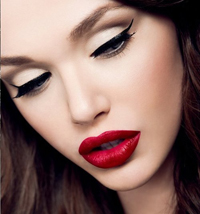
Hey ladies! :) Today I am going to show you the steps for a 'winged liner' or aka the 'pin up' look. It is definitely one of my favorite looks and I often wear it. I do this look when I'm feeling a vintage vibe or I just want to look a little more formal.

Now for this look, you will need:
-black liquid eye liner (fine tip)
-lip liner (nude)
-concealer
-black mascara
-a bright lipstick
-eyelash curler
-eyebrow brush
-eyebrow pencil or brown eyeliner

Step 1: Concealing
First, if you have dark circles, take your concealer and cover them. This will give you a good base to start on.

Step 2: Eyebrows
Take your eyebrow brush and comb your brows so they lay flat. If you don't have a brow brush or an old (clean) mascara brush, get one. These are essential. But for the time being, you can improvise with a fine toothed comb. Next, take the brow pencil or the brown eyeliner and fill in your eyebrows. The look is better with stronger brows. Brush again to blend.

Step 3: Lash Line
Next you are going to take your liquid eyeliner and trace your upper lashes. I usually use a thicker liquid liner for the lash part and a really thin one with a brush or felt tip for the wing part. You can also use a pencil for the thick line. I find that pencils don't fade as fast as liquid. (For thicker lashes, you can trace the upper waterline with your pencil.)

Step 4: Wing
Drawing the wing is a little tricky. I have been wearing this look for roughly two years now and I still have issues with getting it perfect on the first try, so don't stress if it takes a few minutes. Now there are two different styles you can draw. The classic way with just one line or the double winged way where you draw two lines which almost resemble cartoon eyelashes.

You will want to tilt your head back so you can see straight up your nose. (Yes, I realize this is weird but it will make your lines more even.) For the classic one, take your thin liner and start at the end of the thick line you just drew. Remember, you want to only make the line as long as your eye lashes are! (If you are going to wear fake eyelashes, adjust the line length.) So start at the end of the line and draw up towards the end of your eyebrow. Flick the liner at the end so that you have a nice sharp point at the end. The picture below is an example of what it should look like.


For the double line, draw one wing right above where the classic line is suppose to go and one below. This should resemble Disney princess eyes (or in this case, Bambi.)

Step 5: Eyelashes
Mascara time! Coat your eyelashes with a ton of mascara. I normally do around 3-5 coats. Separate your eyelashes with a straight pin or a safety pin. Be very careful cause it kills when you stab yourself. Separate and let them dry in between every coat. After 3 coats, curl with your curler. I know you are suppose to curl them before but I find it works better after some mascara is on first. Wipe down your curler and put more mascara. Or you can apply fake lashes if you want to take your look up a notch.

Step 6: Lips
Last step is lips. Apply chapstick or a clear gloss. Outline your lips with your nude pencil. You can also do it in the same color as your lipstick but I find if you do nude, you will not have a ring about your lips when your color begins to fade. Put on your lipstick. Blot it with a tissue and then reapply the color. This will keep it on longer. I like to put gloss over mine that way, it keeps your lips moisturized. It doesn't really matter what color. I have tried every shade imaginable. If you want to spice it up, try out a darker plum. Take your concealer and clean up the edges.

And you're done! This is what my attempt looked like.

Good luck ladies! :) Comment below to let us know how it worked and/or ask questions.

Love, Mika.


The What.

Greetings to the good people of the internet! :)

Not gonna lie, this is my first ever blog and I am really struggling with figuring out how I want to open this first post. I suppose the beginning is as good as any other place to start. So here I go!

One day, my friend and I were hunting through the racks of our local thrift store. We started discussing about how we could take nearly any piece of clothing and make it usable in an everyday outfit. Now let me specify, we are not including impossible pieces such as ugly Christmas sweaters (although we are most likely going to do a post about it anyway at some point. Why? We like challenges. And I don't know a single person who doesn't like a good laugh, and I'm pretty positive it will be a ridiculous spoof post.) But back to my point, the more we thought about it, the more excited we became.

We decided our blog would be dedicated to showing people how to wear everything from makeup to random articles of clothing to hair styles. We also wanted to focus a lot on working with what you guys already have in your closets AND work around all body types not just the hourglass shape. We will also try to include the more 'seasoned' ages because whether or not you believe it, you just get more beautiful with age. We believe every body is beautiful and we want to inspire self love and individual creativity.

We can't do this blog without your input! Ok, we probably could, but it would be way better if you told us what you wanted. We want your opinions, ideas and questions. Have pieces in your closet that you bought a month ago and still haven't worn it because you have no idea how to incorporate it into daily wear? This is why we are here! Send us a pic of the thing you don't know what to do with, such as a necklace or a pair of shoes, and we will put together a couple outfits for you. (We will try to make an outfit for a bunch of different occasions like work wear, casual, ect.) You may also e-mail us with suggestions on what you want to see on here (ex: Dear Kaeli and/or Mika, I would really like to know how to wear purple eye shadow without looking like I'm in middle school. Thanks! Sincerely, Ms. Smith.) You get the idea.

Love, Mika.